So, You’re Thinking of Going DIY? Let’s Talk Kit.
Alright, so you’ve seen the prices, you’ve checked the budget, and the little voice in your head is saying, “You know what? I reckon I could probably do this myself.” It’s a tempting thought! Going the DIY route to film your own show seems like a surefire way to save a few quid, and it can be a rewarding experience if you get it right.
But getting it right means moving beyond your mobile phone and investing in some proper, dedicated kit. This is where it gets tricky. The world of camera gear is a massive, confusing, and often expensive rabbit hole. What do you actually need to get a decent result without having to remortgage your house?
Don’t panic! This isn’t a guide for professional filmmakers with Hollywood budgets. This is a realistic, boots-on-the-ground look at the essential pieces of gear you should focus on to make your wrestling videography look and sound a million times better than a mate filming from the third row. Let’s break down where to spend your cash and where you can save a bit.
The Brains of the Operation: Choosing Your Camera(s)
This is the big one, the cornerstone of your entire setup. Now, I’m not going to tell you to buy a specific model, because a new one comes out every ten minutes! Instead, let’s focus on the essential features you should be looking for, especially on the budget-friendly, second-hand market.
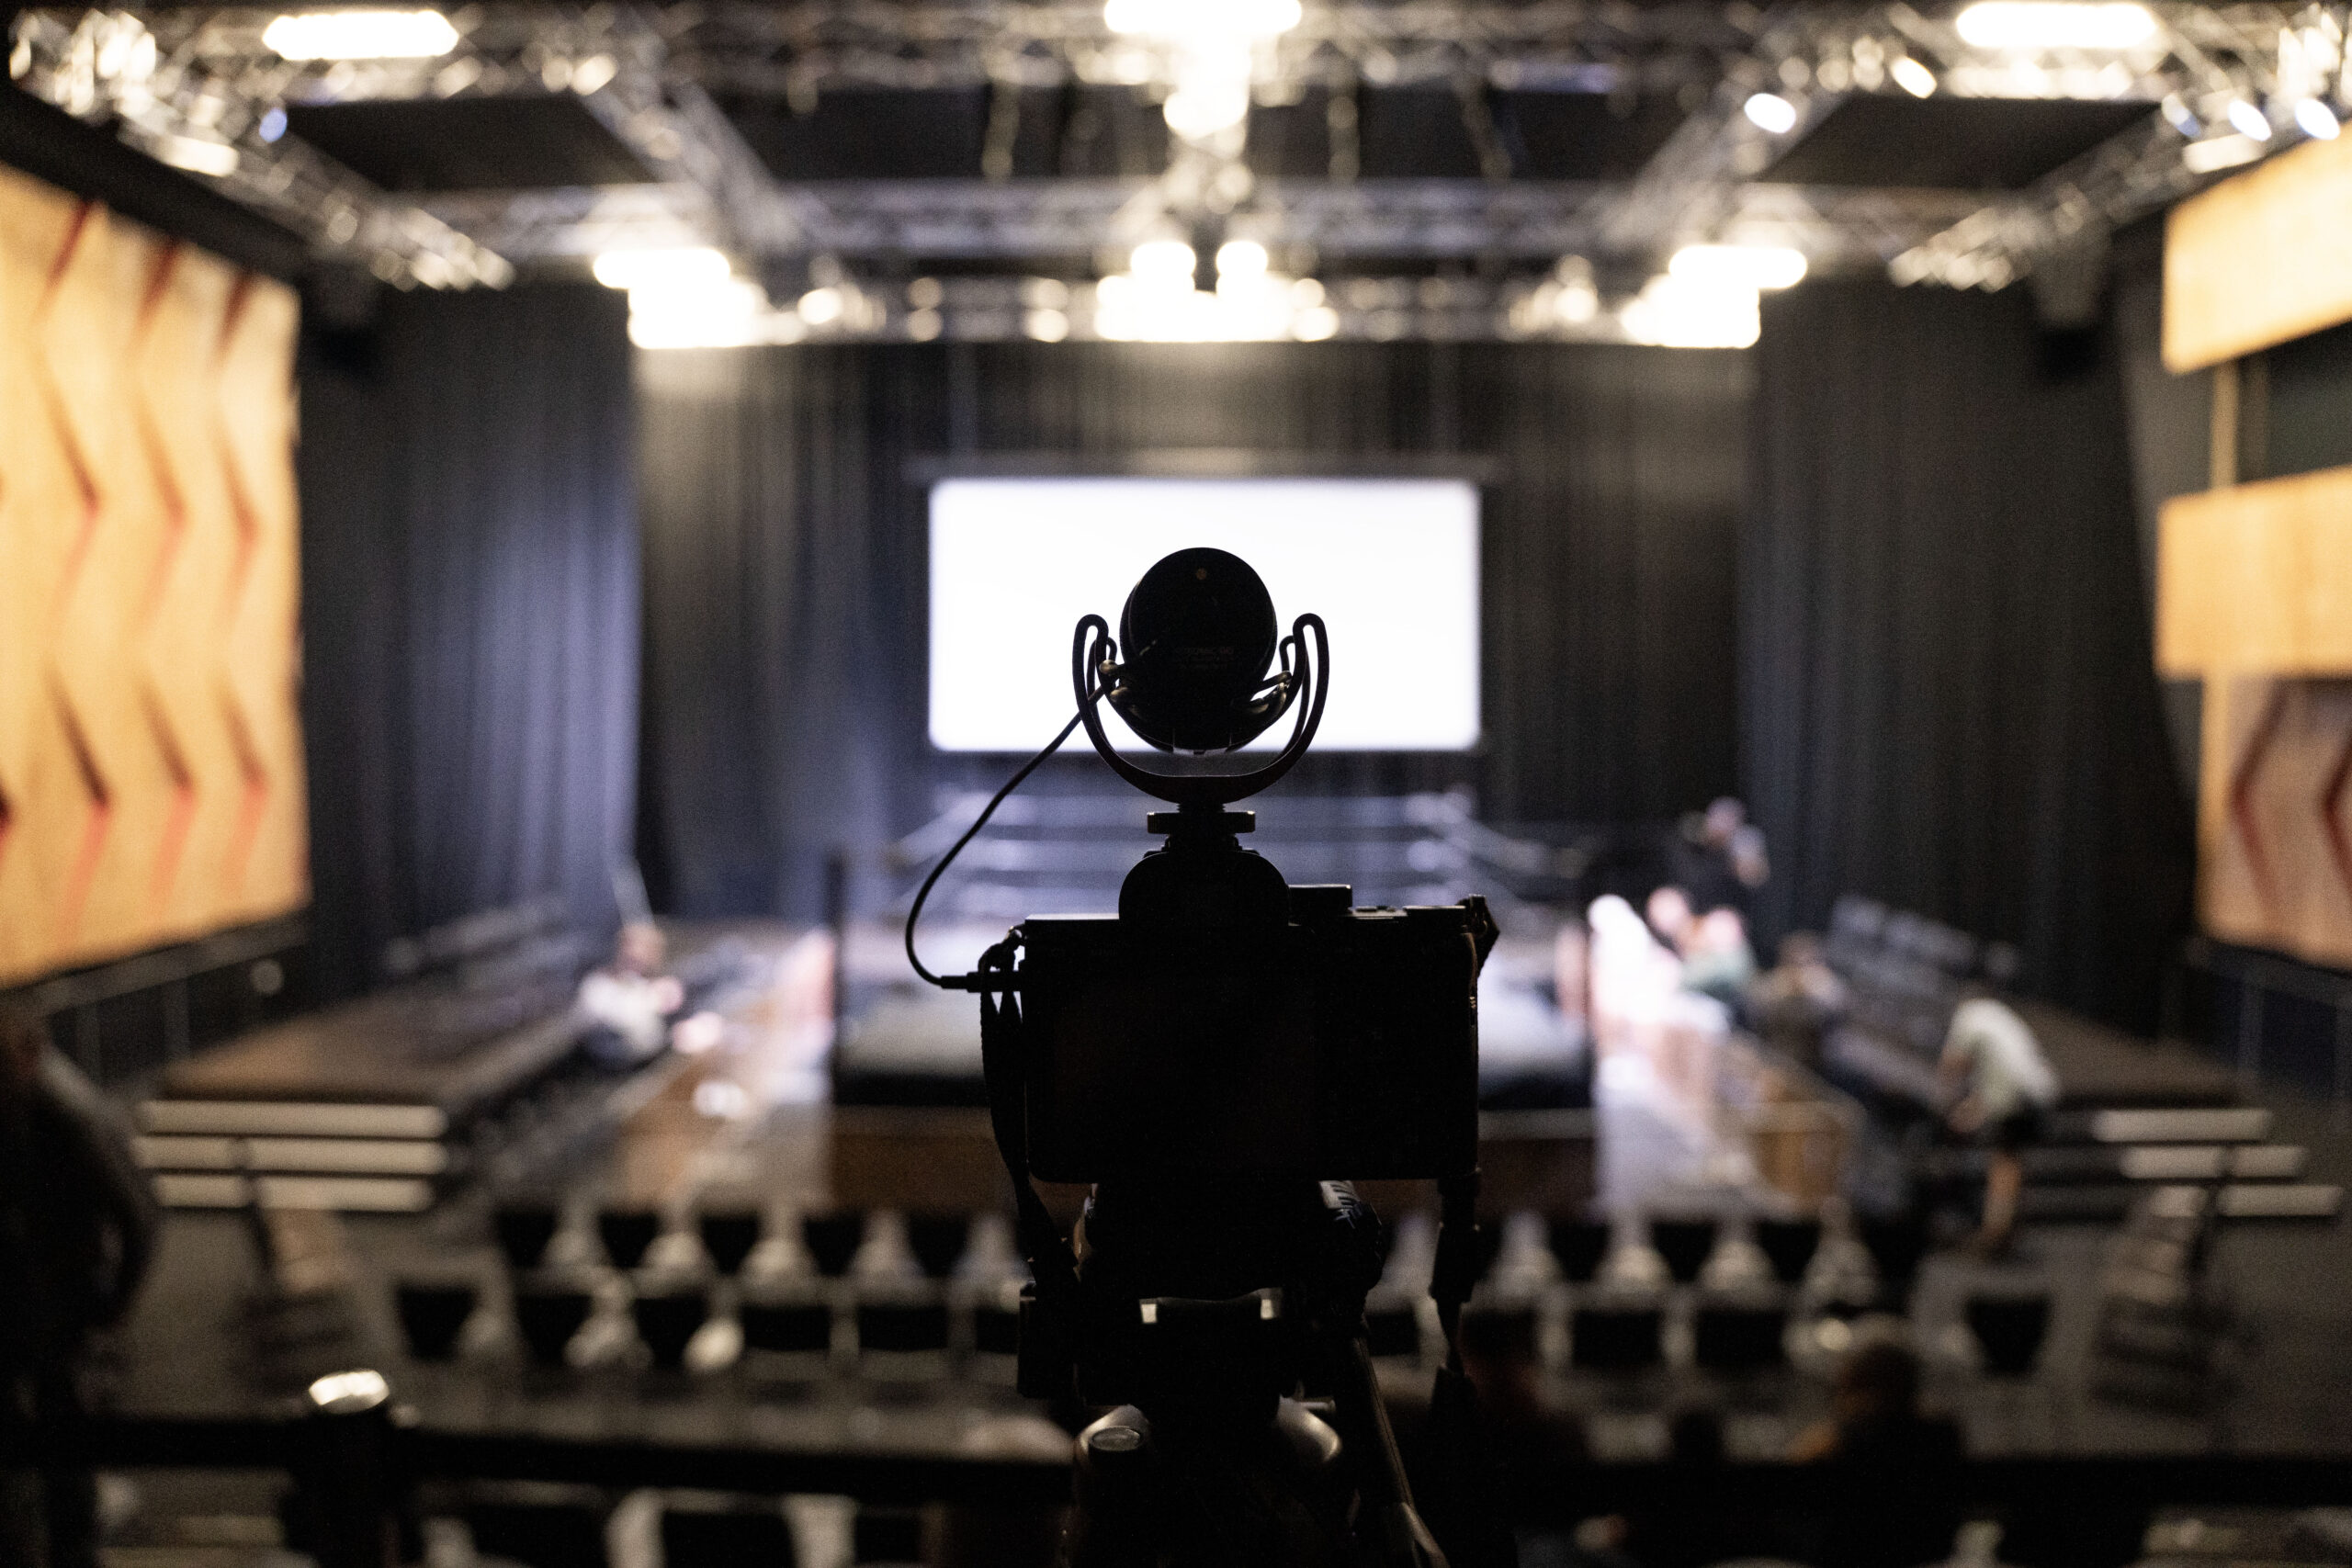
Whatever you’re looking at, it must have these three things: a microphone input (so you can use a proper mic), a headphone jack (so you can actually hear what that mic is recording), and full manual controls. ‘Auto’ mode will get completely bamboozled by the dark crowd and bright ring, so you need to be able to set everything yourself. Good low-light performance is also a massive plus, so check out reviews online.
Your best bet on a budget is often an older mirrorless camera from brands like Sony, Panasonic, or Canon, as they offer great quality for the price. The golden rule? Try to get two of them! Seriously, even two cheaper, identical second-hand cameras are a million times better than one expensive new one. Having two cameras is the secret sauce that separates a basic recording from professional-looking wrestling filming, allowing you to cut between a main wide shot and a ringside angle.
The Unsung Hero: Why a Decent Tripod is Non-Negotiable
You could have the most expensive camera in the world, but if your footage is a shaky, wobbly mess, it’s going to look absolutely dreadful. Seriously, shaky-cam is the number one sign of an amateur production. It’s distracting, nauseating, and an instant turn-off. The simple, cheap, and heroic solution? A decent tripod.
And I don’t mean the flimsy, ten-quid plastic thing you find in a supermarket. You need something sturdy that won’t wobble every time the fans stamp their feet. The most important feature to look for is a ‘fluid head’. This is a head specifically designed for video, allowing you to pan (move side to side) and tilt (move up and down) in a silky-smooth motion. A cheap tripod designed for photography will be stiff and jerky, making it impossible to follow the action without it looking awful.
This is a great area to check the second-hand market. A used, professional-grade tripod from a brand like Manfrotto will last you a lifetime and can often be found for the same price as a rubbish new one. A stable, smooth-moving camera is the foundation of all good wrestling videography, so don’t even think about skipping this!
The Audio Attack Plan: How to Sound Like a Pro on a Shoestring
If a shaky camera is the number one sign of an amateur video, then terrible audio is a very, very close second. That fuzzy, distant, muffled sound from your camera’s built-in microphone will instantly kill the vibe of your show. Sorting out your audio is arguably the best bang-for-your-buck upgrade you can make.
First, you need an on-camera shotgun microphone. Brands like Rode and Deity make fantastic, affordable models. This mic plugs directly into your camera’s mic input and is designed to focus on the sound directly in front of it, cutting out a lot of the distracting side-noise. This is brilliant for capturing wrestler’s trash talk and getting a cleaner overall sound from the hard cam position. This is the absolute bare minimum you need.
Want the secret pro-level trick? Get a cheap, separate audio recorder like a Zoom H1. You can tuck this little device safely somewhere at ringside (maybe taped under the ring apron). This will capture the thunderous, bass-heavy BOOM of every single bump and slam with incredible clarity. In the edit, you simply sync this high-quality “ring audio” with your main camera audio. This simple two-pronged attack is a game-changer for budget wrestling filming.
Let There Be (Affordable) Light!
Okay, let’s be upfront about this: lighting is probably the hardest and most expensive part of the production puzzle to solve on a tight budget. Most community halls and social clubs are lit with dreadful fluorescent lights that flicker on camera and make everyone look a bit green. Relying on the venue’s lights alone is a recipe for a grainy, murky-looking video.
But you don’t need a full, arena-sized lighting rig to make a huge improvement. The goal on a budget is simply to get more clean, consistent light onto your main stage: the ring. Your best bet is to invest in a couple of affordable LED light panels. The market for these has exploded thanks to YouTubers, and you can now get some pretty powerful and reliable lights without breaking the bank.
Get two panels, pop them on sturdy stands, and place them in opposite corners of the room, raised high and aimed down at the ring. This will help to create a much more even wash of light, reduce ugly shadows, and give your camera sensors the light they desperately need to produce a clean image. Good lighting is what separates murky footage from clean, professional wrestling videography. Just make sure your stands are safely secured and all your cables are properly taped down!
The Boring Bits: Batteries, Cards, and Hidden Costs
So, you’ve got your cameras, tripods, mics, and lights. You’re all set, right? Not so fast. The big-ticket items are just the start. The real cost of a DIY setup often lies in the mountain of “boring but essential” accessories that you absolutely cannot manage without.
First, there’s power and memory. You’ll need a stack of spare batteries for each camera (at least three per camera, minimum!) and a whole load of high-capacity, high-speed memory cards. Video files are massive, and the last thing you want is to run out of space or power during your main event! Then there are the cables, the battery chargers, the extension leads, the gear bags to carry everything, and a roll of gaffer tape (which is basically the secret MVP of any production). These all add up.
But the biggest hidden cost isn’t gear; it’s post-production. Do you have a computer that’s powerful enough to edit hours of multi-camera footage? A standard laptop will likely grind to a halt. You’ll also need editing software, which can come with a hefty subscription fee. More than anything, you’ll need time. Learning to edit and then actually putting together a full show is a massive time-sink. This is often the point where the true cost of DIY wrestling filming becomes clear.
Last Bits of Kit & Key Questions about Wrestling Videography: An FAQ
Q: If I can only afford to upgrade ONE thing to start with, what gives me the most bang for my buck?
A: Audio, without a doubt. Get yourself a decent on-camera shotgun microphone. While a tripod is vital for stability, upgrading your sound is the single biggest jump in perceived quality you can make. Clean, crisp audio can make decent-looking footage feel much more professional, but terrible audio will make even the most beautiful video unwatchable. Start with sound.
Q: Is it better to buy all this gear new or second-hand?
A: For a budget DIY setup, the second-hand market is your absolute best friend. You can get much higher-quality, professional-grade cameras and tripods from trusted brands for the same price as new, lower-quality consumer gear. Check out reputable online camera shops that sell used kit, or even Facebook Marketplace if you’re careful. The only things you should probably buy new are memory cards and batteries, just to be on the safe side.
Q: After adding all this up, is it actually cheaper to buy gear or just hire a pro?
A: For a single, one-off show, it is almost always cheaper, easier, and less stressful to hire a professional crew. They have already absorbed the huge cost of the gear, they have the expertise to use it, and they handle the incredibly time-consuming edit. If you plan on running shows very regularly and are genuinely passionate about learning the craft of wrestling videography yourself, investing in gear might pay off in the very long term. But you must remember to factor in the massive hidden cost of your own time.


